
Replace a Fill Valve (Toilet)
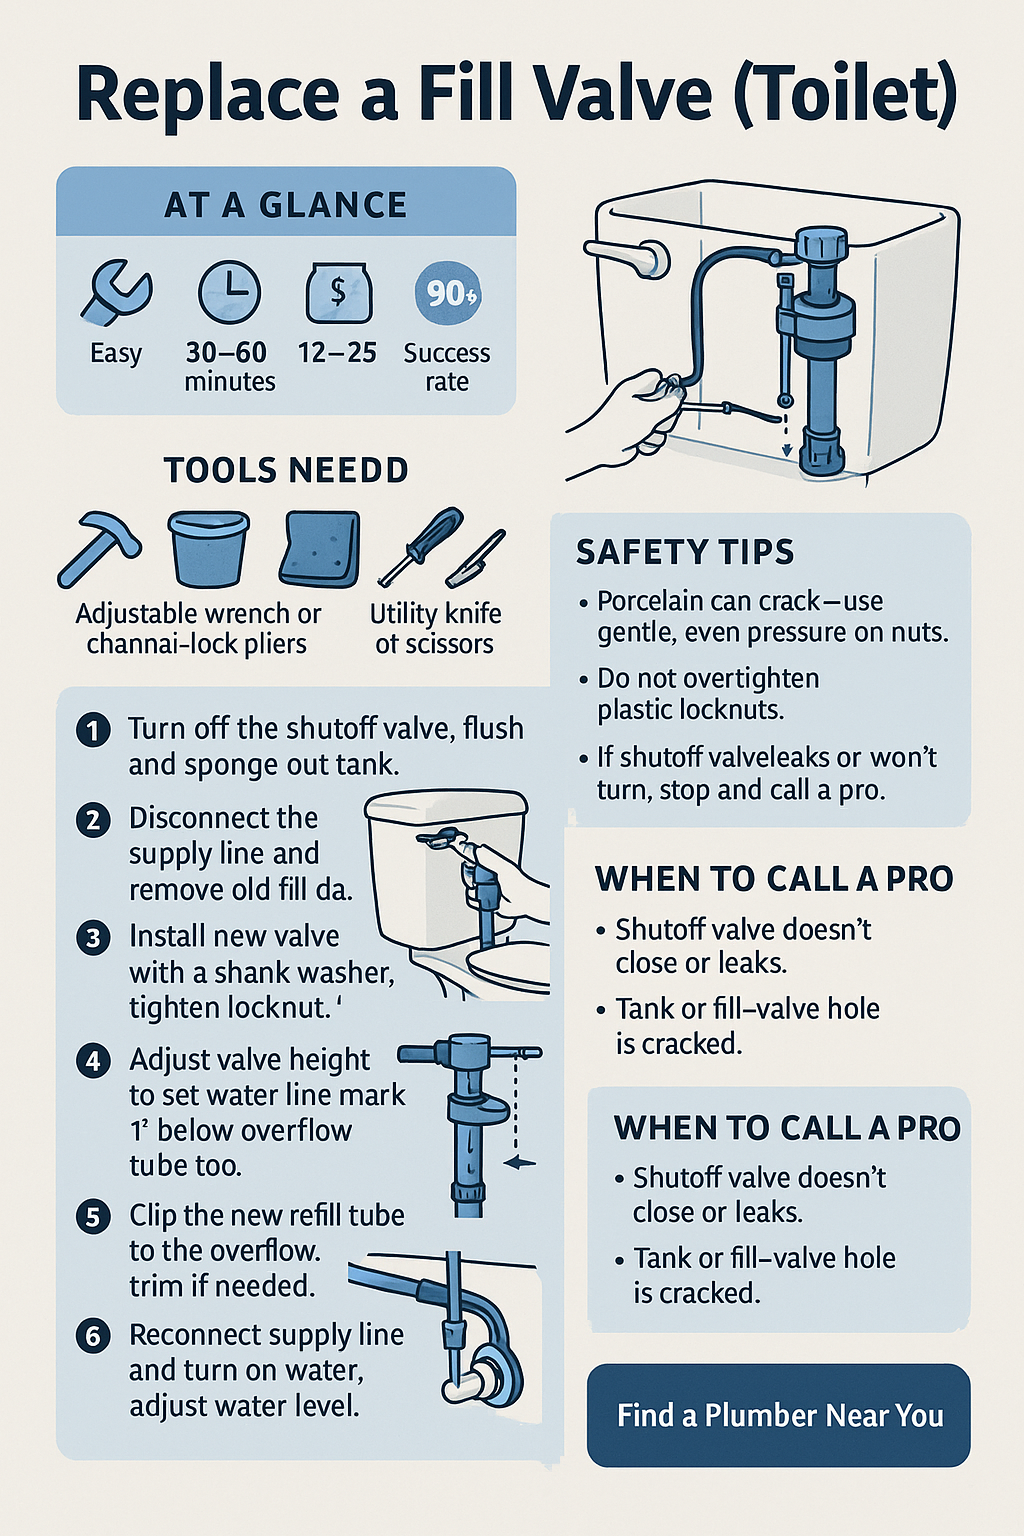
-
Adjustable wrench or channel-lock pliers
-
Bucket or small pan
-
Sponge or towel
-
Flat/Phillips screwdriver (as needed)
-
Utility knife or scissors (to trim refill tube)
-
Replacement fill valve (universal, height-adjustable)
-
New shank washer and locknut (usually included)
-
Refill tube with clip (included)
-
Optional: new flexible supply line (if old one is stiff or corroded)
-
Porcelain can crack—use gentle, even pressure on nuts.
-
Do not overtighten plastic locknuts.
-
If the shutoff valve leaks or won’t turn, stop and call a pro.
-
With the handle untouched, the tank should stop at the set level with no hiss.
-
Flush twice to confirm quick, quiet refills and proper bowl refill.
-
Dry connections and check for any weeping at the shank or supply line after 2–3 minutes.
-
Wipe the tank rim and reinstall the lid carefully.
-
Empty the bucket; discard the old valve and washers.
-
Confirm the problem: tank refills on its own, slow fill, or hissing at the valve.
-
Test the shutoff valve; verify it turns fully off.
-
Note current waterline mark inside the tank (or 1″ below overflow top).
-
Turn the shutoff valve clockwise to stop water; flush and hold the handle to drain most of the tank.
-
Sponge out the remaining water around the fill valve area.
-
Disconnect the supply line from the bottom of the tank (place a bucket underneath).
-
Inside the tank, remove the refill tube from the overflow; note its clip position.
-
From below the tank, loosen and remove the plastic locknut holding the fill valve; lift the old valve out.
-
Install the new shank washer on the new valve (tapered side up toward the tank).
-
Insert the valve through the tank hole; hold it vertical. From below, hand-thread the locknut and snug gently with pliers—do not overtighten.
-
Adjust valve height so the “water line” mark on the valve sits about 1″ below the top of the overflow tube.
-
Reattach the supply line to the valve shank; hand-tighten, then give a small additional turn with the wrench.
-
Clip the new refill tube to the overflow so the tube discharges above the tube (not down inside). Trim length if needed—no kinks.
-
Turn the water on slowly; let the tank fill.
-
Adjust the water level using the valve’s float screw/slider until it matches the tank’s waterline or sits 1″ below the overflow.
-
Shutoff valve won’t close or starts leaking.
-
Tank or fill-valve hole shows cracks.
-
Persistent running even after correct height/level and new valve.
-
Overtightening the plastic locknut or supply line.
-
Setting the water level at or above the overflow tube top.
-
Routing the refill tube down inside the overflow (causes siphoning).
-
Leaving the valve too short or too tall for the tank.
Q: Fill is very slow after replacement.
A: Check that the shutoff is fully open and the supply line screen isn’t clogged.
Q: Water keeps entering the bowl between flushes.
A: Likely flapper/flush-valve seal issue, not the fill valve—replace the flapper and set proper chain slack.
Q: Loud whistle or hammer during fill.
A: Ensure the refill tube isn’t kinked; check pressure and consider adding water-hammer arrestors if hammer persists.
Q: Drip at the shank nut.
A: Back off slightly, reseat the shank washer, then re-snug hand-tight plus a tiny turn.